I realized I haven’t posted vegetarian recipes in a long long time. I’m not a big fan of Idlis… what do you do when this is your staple diet all along (almost every day when I was in school). Needless to say, I was in no mood to make Idlis again for dinner…It struck me that complaining can only lead to disgust...why not experiment…but, can Idlis get interesting…? Read on…
A small flash of the bulb and I said to myself…"Stuffed Idlis”…nice thought but before I go on…I strongly recommend that you must try it once. Enjoy them even without chutney (the culprit that oozes calories). Colourful and healthy, and mark this – sure to make a very good meal for your kid’s lunch box.

Hey, one small pause here - let me first share the good news with you…Sometime in January I saw a ‘Kitchen Queen’ contest by Scotch-Brite on my Facebook wall. I sent them one of my original recipes (Gudbud Gotala). In February, I got a call from Scotch-Brite informing my qualification to the next round and if I’d be interested to take part. I was overjoyed and when I reached the hall (at Hotel Royal Orchid). It was exciting to know that out of 7000 entries (in Bangalore), lo behold…I was one among the top 50!! There was this soothing sense of pride (I couldn’t stop smiling!). Then there were 3 written tests (first – cooking quiz, second – taste a mini samosa and write the ingredients and third was a Scotch-Brite quiz). Sadly, I didn’t make it after the written tests. I am glad I tried and didn’t sulk over my poor chances (without trying). This whole experience has lingered…and now, I am very sure I will participate in contests and quizzes such as this one…there’s so much to learn, get inspired and motivated…and importantly, take them as ego boosters. So, here’s a request to all of you…if you come across such announcements (in Bangalore)…please let me know.

Now, the slurrrrpy, pretty and nutritious stuffed Idlis
You need:
Idli batter (about half a litre)
1 large onion (cut into small cubes)
1 large tomato (de-seeded and cut into small cubes)
1 large capsicum (cut into small cubes)
1 large carrot (grated)
1 large potato (finely cut and par boiled)
1tsp mustard seeds
1tsp jeera seeds
1 tsp chilli powder (adjust according to your spice tolerance)
½ tsp turmeric powder
½ tsp coriander powder
½ tsp saunf powder
½ tsp garam masala
Salt to taste
4tsps sunflower oil
Few sprigs of coriander leaves (to garnish)
Step-by-step:

Keep the Idli batter out of the refrigerator (these Idlis taste good even if the batter is a lil’ sour)

Arrange all the vegetables and keep them in separate bowls (you can use vegetables of your choice)

Add 3tsps of oil into a kadhai. Once hot, add the mustard seeds

After the mustard seeds crackle, add the jeera and fry

Now add the onions and fry till they turn translucent

(Let’s start the colour game now) Add the carrots and fry

Once the carrots are half done, add the capsicum

In goes the tomatoes now ( you don’t have to wait for it to get mushy)

Add in the potatoes and toss (looking beautiful already!)

Add in all the dry powders and salt. Fry for 2-3 minutes (or till the masala is cooked)

Garnish with freshly chopped coriander
Your stuffing is done

Now pull out your idli steamer and rub some oil on each of them (so it doesn’t stick)

Spoon in a little idli batter (very little or you won’t have space for the last spoon of batter)

Now add a little masala (do not get generous)

Pour another spoon of idli batter (just enough to cover the masala)
Repeat the same process on all portions of the steamer
Shift it on to the gas on low fire and let it steam for about 10 minutes (it takes the same time as plain idlis)
Meanwhile, you can grind up your coconut chutney ( scroll down for the recipe)
Back to the Idlis - pull out the pretty stuffed Idlis (be careful as the steam can burn your fingers)

Repeat the same process for the rest of the Idli batter and stuffing (you can save the filling for a lazy day too:) )
Coconut Chutney
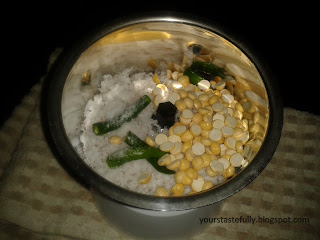
Grind together 3 green chillies, 1 cup grated coconut, 2tsps roasted gram dal, salt and very little water.
Check the consistency and add water (it’s better if the chutney is thick)

Transfer on to a serving bowl
Temper the chutney with 1tsp sunflower oil, 1/2tsp mustard seeds and a few curry leaves (love the aroma!)

Your chutney is ready to serve
Don’t wait…go ahead and grab some praises…and beaming smiles of all your loved ones!!
A small flash of the bulb and I said to myself…"Stuffed Idlis”…nice thought but before I go on…I strongly recommend that you must try it once. Enjoy them even without chutney (the culprit that oozes calories). Colourful and healthy, and mark this – sure to make a very good meal for your kid’s lunch box.

Hey, one small pause here - let me first share the good news with you…Sometime in January I saw a ‘Kitchen Queen’ contest by Scotch-Brite on my Facebook wall. I sent them one of my original recipes (Gudbud Gotala). In February, I got a call from Scotch-Brite informing my qualification to the next round and if I’d be interested to take part. I was overjoyed and when I reached the hall (at Hotel Royal Orchid). It was exciting to know that out of 7000 entries (in Bangalore), lo behold…I was one among the top 50!! There was this soothing sense of pride (I couldn’t stop smiling!). Then there were 3 written tests (first – cooking quiz, second – taste a mini samosa and write the ingredients and third was a Scotch-Brite quiz). Sadly, I didn’t make it after the written tests. I am glad I tried and didn’t sulk over my poor chances (without trying). This whole experience has lingered…and now, I am very sure I will participate in contests and quizzes such as this one…there’s so much to learn, get inspired and motivated…and importantly, take them as ego boosters. So, here’s a request to all of you…if you come across such announcements (in Bangalore)…please let me know.

Now, the slurrrrpy, pretty and nutritious stuffed Idlis
You need:
Idli batter (about half a litre)
1 large onion (cut into small cubes)
1 large tomato (de-seeded and cut into small cubes)
1 large capsicum (cut into small cubes)
1 large carrot (grated)
1 large potato (finely cut and par boiled)
1tsp mustard seeds
1tsp jeera seeds
1 tsp chilli powder (adjust according to your spice tolerance)
½ tsp turmeric powder
½ tsp coriander powder
½ tsp saunf powder
½ tsp garam masala
Salt to taste
4tsps sunflower oil
Few sprigs of coriander leaves (to garnish)
Step-by-step:

Keep the Idli batter out of the refrigerator (these Idlis taste good even if the batter is a lil’ sour)

Arrange all the vegetables and keep them in separate bowls (you can use vegetables of your choice)

Add 3tsps of oil into a kadhai. Once hot, add the mustard seeds

After the mustard seeds crackle, add the jeera and fry

Now add the onions and fry till they turn translucent

(Let’s start the colour game now) Add the carrots and fry

Once the carrots are half done, add the capsicum

In goes the tomatoes now ( you don’t have to wait for it to get mushy)

Add in the potatoes and toss (looking beautiful already!)

Add in all the dry powders and salt. Fry for 2-3 minutes (or till the masala is cooked)
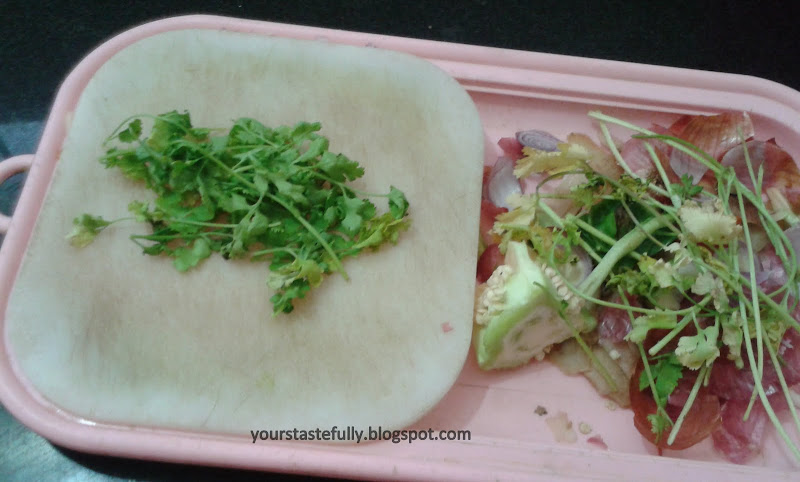
Garnish with freshly chopped coriander
Your stuffing is done

Now pull out your idli steamer and rub some oil on each of them (so it doesn’t stick)

Spoon in a little idli batter (very little or you won’t have space for the last spoon of batter)

Now add a little masala (do not get generous)

Pour another spoon of idli batter (just enough to cover the masala)
Repeat the same process on all portions of the steamer
Shift it on to the gas on low fire and let it steam for about 10 minutes (it takes the same time as plain idlis)
Meanwhile, you can grind up your coconut chutney ( scroll down for the recipe)
Back to the Idlis - pull out the pretty stuffed Idlis (be careful as the steam can burn your fingers)

Repeat the same process for the rest of the Idli batter and stuffing (you can save the filling for a lazy day too:) )
Coconut Chutney

Grind together 3 green chillies, 1 cup grated coconut, 2tsps roasted gram dal, salt and very little water.
Check the consistency and add water (it’s better if the chutney is thick)

Transfer on to a serving bowl
Temper the chutney with 1tsp sunflower oil, 1/2tsp mustard seeds and a few curry leaves (love the aroma!)

Your chutney is ready to serve
Don’t wait…go ahead and grab some praises…and beaming smiles of all your loved ones!!
Yours Tastefully


